We recently celebrated J’s fourth birthday. Unlike last year when we had the Thomas tank engine cake, this year the theme isn’t very strong. I was going for the whole Toy Story / super heroes theme with a party at Museum of Technology and Transport. I was wondering what cakes I could do when I stumbled upon an alien cake. J loves the three-eyed aliens, they are her favourite characters! I went to my local kitchen shop and bounced my ideas off a sales lady there.
The criteria:
– Relatively quick
– Easy to transport
– Resemblance
– A point of difference
– Challenging elements such as new techniques
The cake was simple – I used my favourite chocolate cake recipe and baked it in a Wilton’s oval tin.
I did this the night before I needed to ice it.
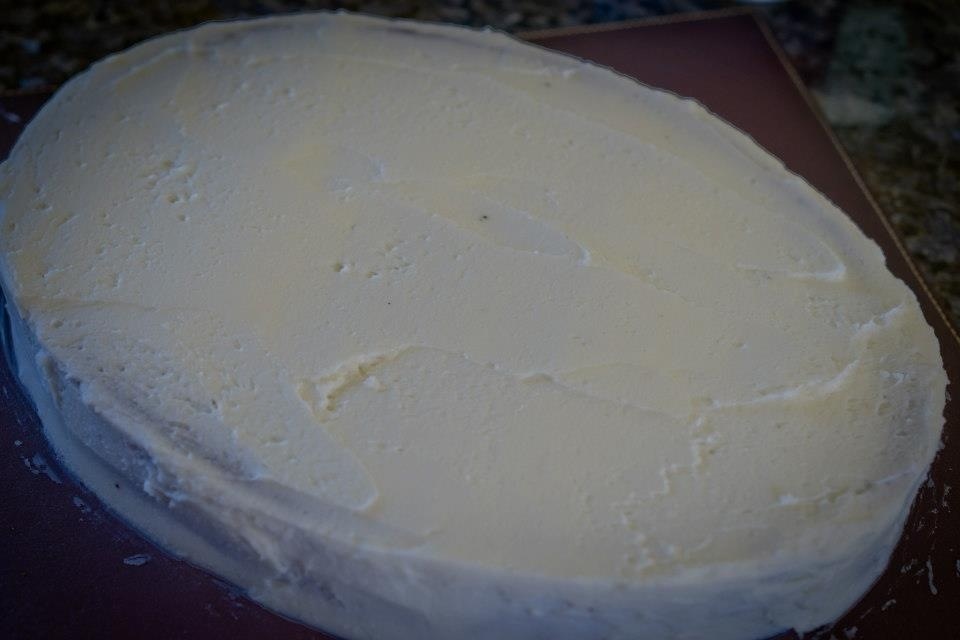
I made up a simple buttercream icing, and covered the cake first thing in the morning. The cake was not crumbly which made the icing job much easier.
Next was the fondant.
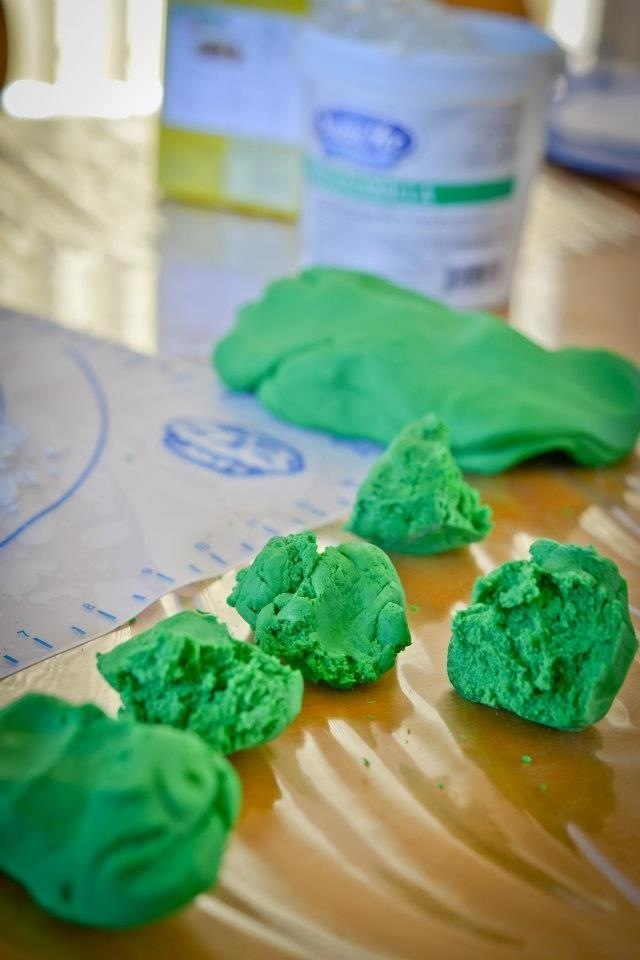
I had watched enough Masterchef episodes to know how it should work. Luckily too they showed how hard the contestants had to knead it before it was ready – I would have doubted and threw the rock hard fondant away. After about 15 minutes of kneading…
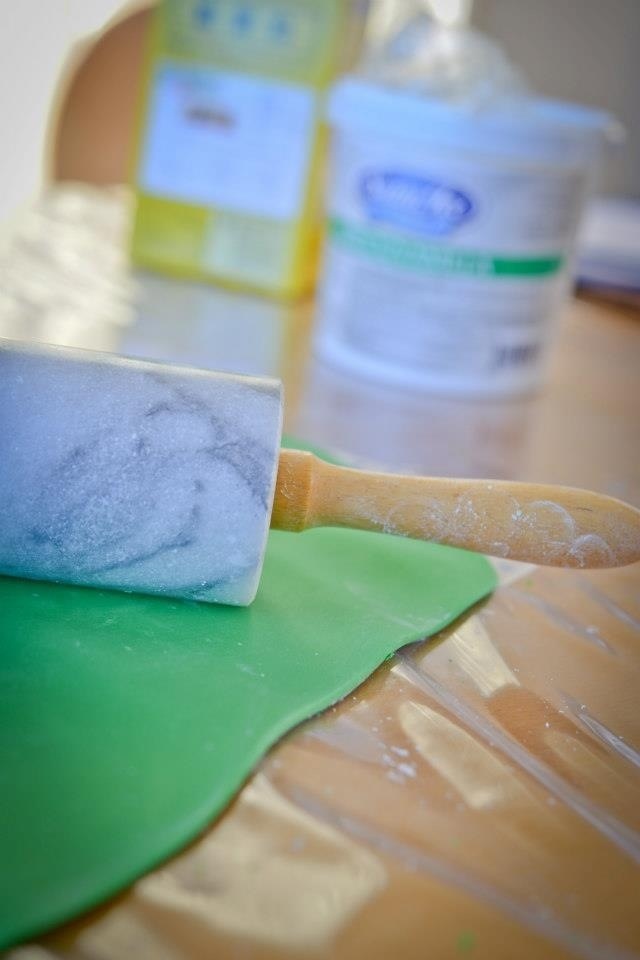
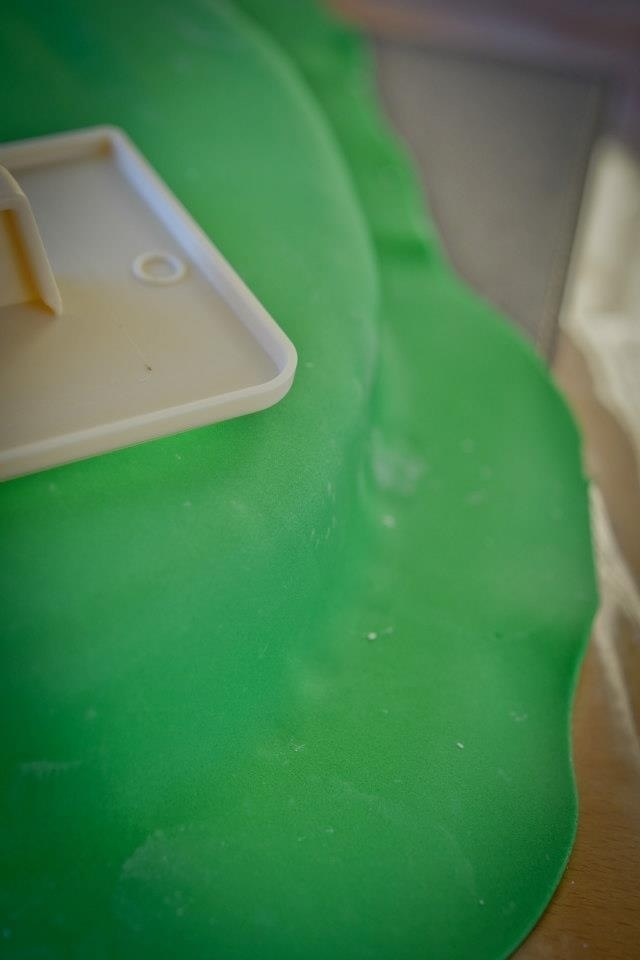
I rolled the green fondant out, large enough to cover my cake.
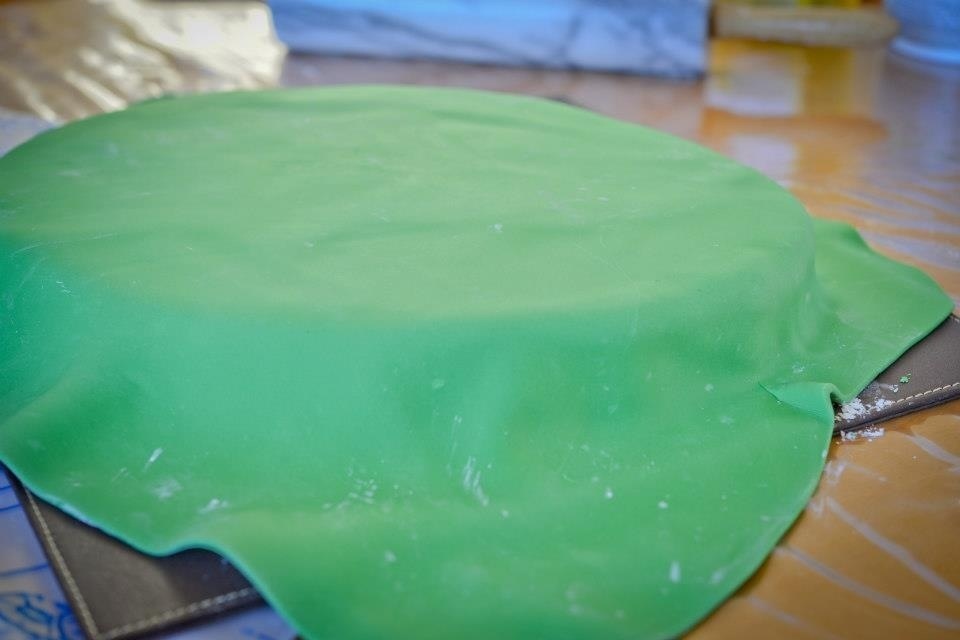
Lifting it up with a rolling pin, I rolled it over the cake and then smoothed out the sides.
I actually did a ‘wahoo!!’ jump at this point as I never thought it would be so easy.
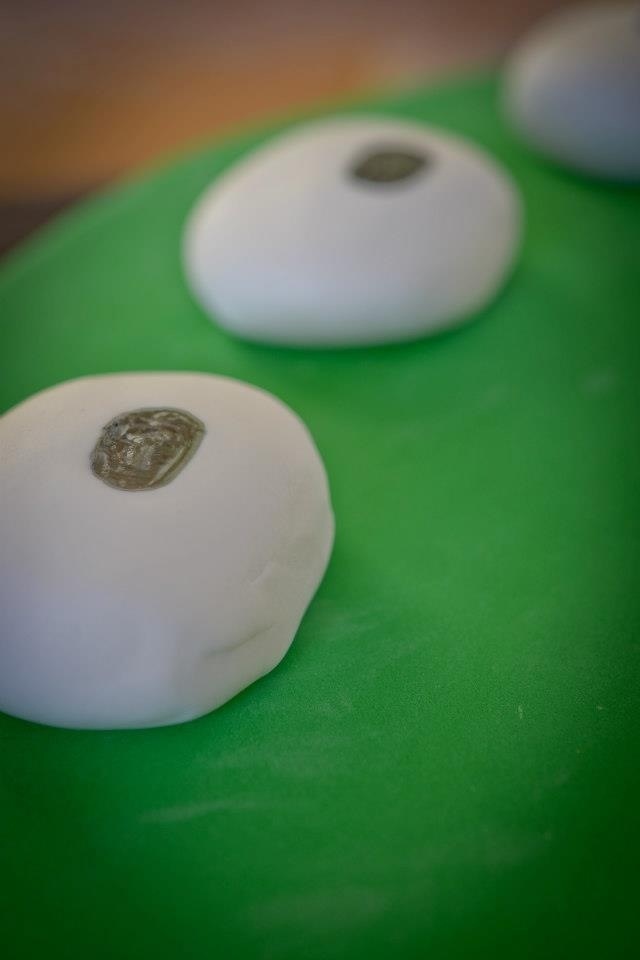
I rolled some white fondant into three oval shaped balls for the eyes and marked the pupils with a black edible marker.
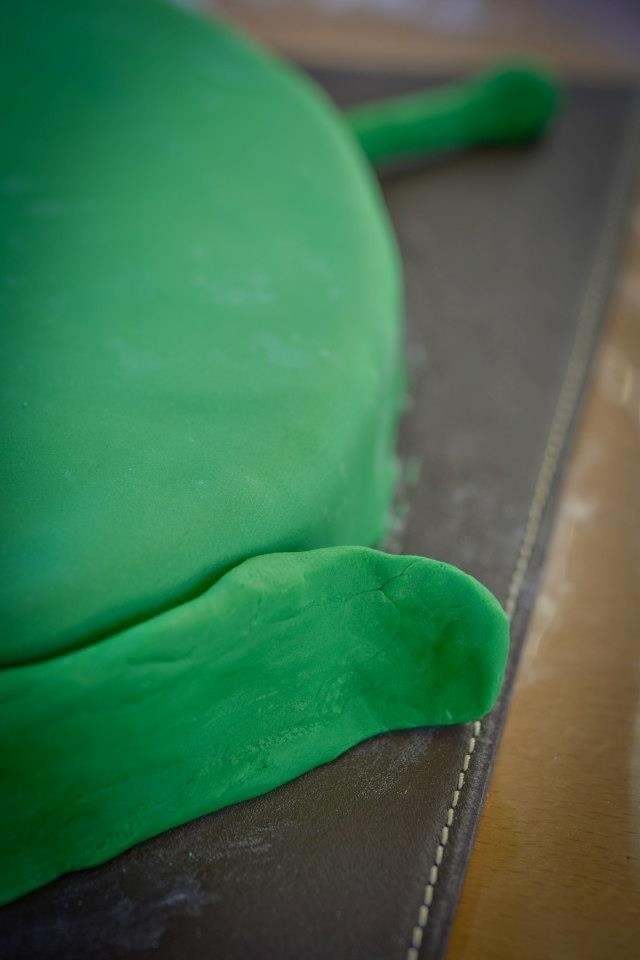
I mixed a smidgen of tyler powder ( you can also use gum tex, but it’s not really necessary for this project) into some green fondant to make the ears ( the paste makes the fondant harder), and also shaped a long piece for the candles.

I rolled a log shaped piece of green fondant and pushed a cake pop stick inside to make it firm. I stuck a ball shaped piece to the end and this became the alien’s antennae. I stuck it to the head.

Timestamp: From starting the icing to finishing the cake, it was 1.5 hours.
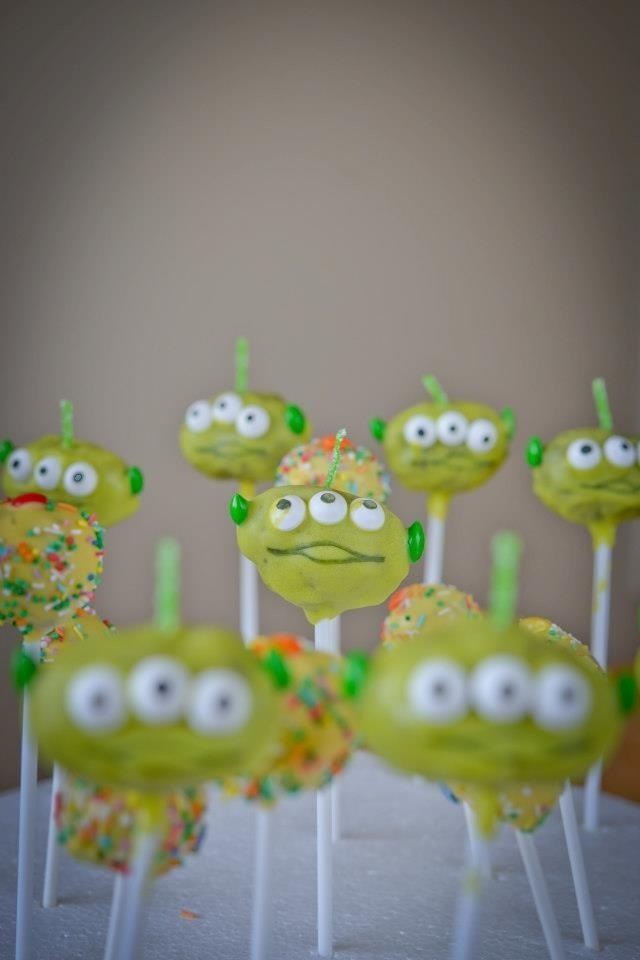
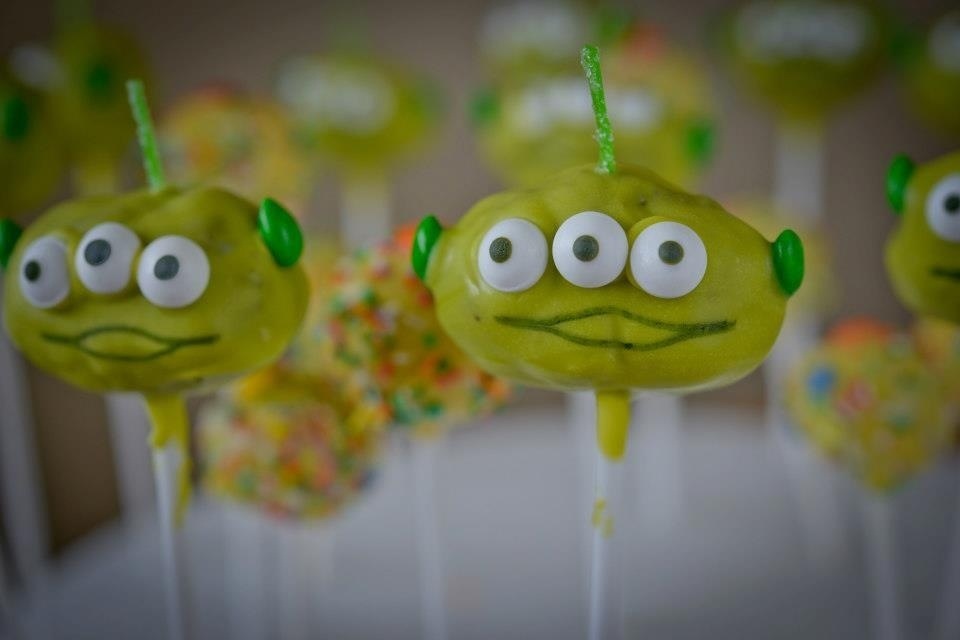
Next were the cake pops. Note that I start the cake pops the night before they are finished because I don’t often have a whole day in the kitchen all by myself. You can start the same day but I would recommended baking the night before to save on waiting time.
Using the same chocolate cake recipe ( or you could easily use the boxed cake mixes), I baked a cake the night before and let it cool.
Once it’s cool, breakup the cake in a large container. I tear the cake up into six pieces first, then crumble each piece till there are no more big pieces. Mix half a tub of chocolate icing into the crumbled cake, and start bringing the mixture together. Just use a large spoon to do this. Some people suggests doing this by hand, with gloves. I’ve tried it and don’t like it because I ended up with so much icing stuck on my gloves instead of the cake.
Using a small cookie scoop ( these are smaller than your ice cream scoops), shape the mixture into small balls of cake. Roll them into oval shapes. Place then in a sheet and let it firm up in the fridge for an hour.
For the green chocolate coating, you will need the following:
– Spooky green chocolate melts (the colour matches the Toy Story aliens better than the normal green chocolate melts)
– Cake pops sticks 6″ long
– Edible eyes (I bought these to save time, but you can make them with drops of white royal icing)
– Green chocolate coated sunflower seeds
– Sour apple- flavoured strips, cut into little pieces
– Ceramic chocolate melting cup
Place the green chocolate melts into the ceramic cup, fill to about half way.
Melt in microwave in DEFROST mode ( this is very important, hence the shouty capitals, if you don’t want burnt chocolate) for 15 seconds at a time, till it melts.
Dip the end of the pop stick into the green chocolate, then stick this end into the bottom of the oval cake ball. Careful not to poke the cake ball too much or too little. If the cake balls fall apart, leave them in the fridge for longer. The little bit of chocolate will help to hold the cake ball on the stick.
Holding the end of the stick, dip the cake ball into the melted chocolate to completely cover it. Don’t move it around too much or you will get cake crumbles into the chocolate.
Ever so gently swirl the dipped cake ball over the melted chocolate cup, to let the excess dribble off.
Now I needed an extra pair of hands to help and J came to the rescue.
She quickly placed three googling eyes, while I placed the ears and antennae onto the cake balls.
Voila! All done.

I placed them on a round cake dummy for drying and display. I used the edible marker pan to draw a mouth for each alien.
We had more cake balls left so we shaped them into spheres and dipped them in yellow chocolate melts, with a liberal splashing of sprinkles. These formed our planets.
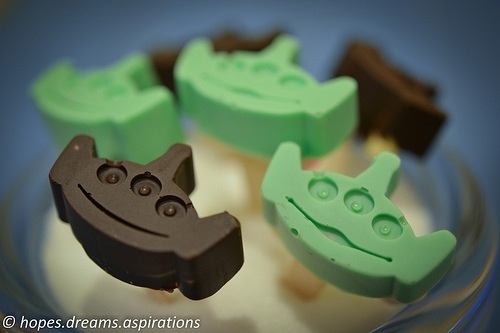
What should I do with the left over green chocolate melts?
I poured them into a silicone mould with alien shapes (authentic Toy Story alien ice cube tray, gift from grandma in Hong Kong, and was quite expensive and we weren’t quite sure we will get too much use out of it at the time, but now so totally worth it!!) and made lots of green alien candies.
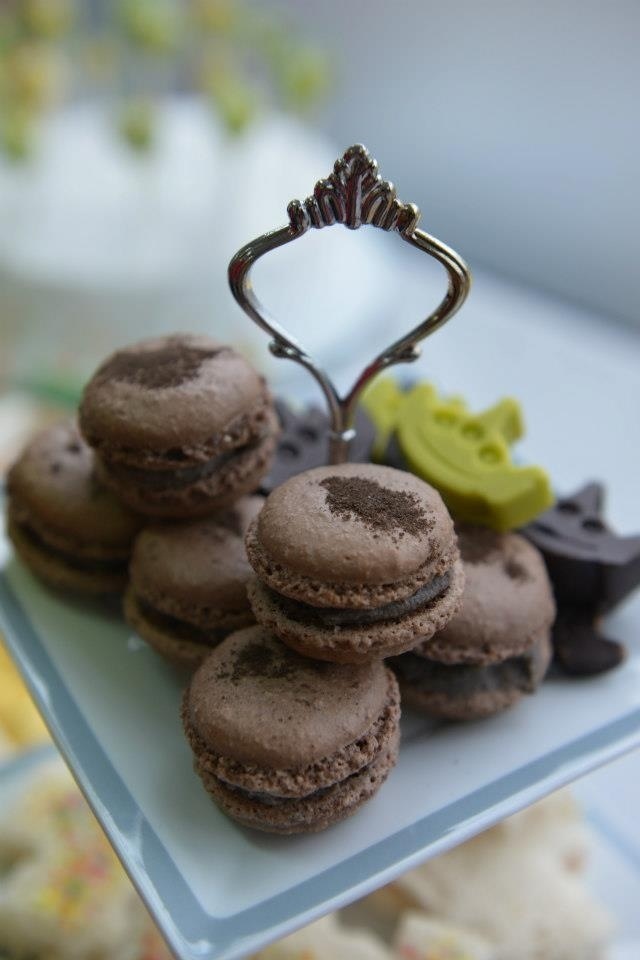
Sorry I don’t have a picture of the candies by themselves, and only have one of them with the Oreos macarons.
We bagged these up for the kiddos to take away. I think most of them went straight for it though.
We also made some chocolate marshmallow sticks – the idea came from chocolate spoons or sticks for making a hot chocolate drink, but like the candies, they were consumed straight away as is.
I hope I’ve inspired you to make some cake pops or fondant cakes – just let your imagination take you to a different place! Hope to see some links to your works out there, do share 😉

This is so cool! Toy Story candy molds? Oh yeah!
Molds are super cool! They were such a hit with the four-year-olds.
I can imagine! They adore that movie and those candies were soooo cool!!!!!
my daughter’s addicted to chocolate molds lately and we have stocked up during our overseas visit…watch this space! =)
I will! So exciting!!!!!