Once again I delegated the task of choosing our next macaron flavour to J. ‘What colour macaron should we make this time?’
‘er. Teal!’ ( that being my favourite colour)
Hm how can I get this colour without buying the actual colour gel? A bit of blue and yellow should do the trick! Read my basic macaron recipe:
Macaron shells
90 g almond meal
60 g macadamia meal
150 g icing sugar
58 g egg whites extra
Italian meringue
58 g egg whites (about 1.5 egg)
1 g meringue powder
150 g caster sugar
38 g water
5 drops of blue coloring gel
2 drop of yellow coloring gel
Instead of sifting, I blitzed the almond meal and icing sugar until it is a fine powder.

Put the first lot of egg whites into your stand mixer.
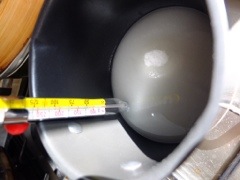
Clip the sugar thermometer according to manufacturer’s instructions to a milk saucepan. Don’t let it touch the bottom of the pan. Put the water and caster sugar in and dissolve the sugar over a low heat. Some recipes say you should stir this gently – I’ve found that so long as I didn’t splash the sugar around, I won’t even have to stir. Use a clean pastry brush to brush down the side of the saucepan to avoid any crystallization if the liquid splashes up. Increase the heat and bring to the boil.

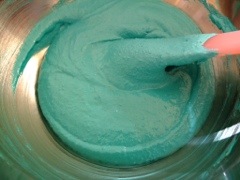
To make teal-coloured shells, I added the gel colourings to my Italian meringue. The amount depends on the strength of your gel, what depth of colour you desire and how it mixes with other ingredients. Practice is the only way to test it out. I scrapped tiny balls out using a tooth pick. I used the Wilton brand of gels.

Cook the sugar syrup until it reaches 70°C. You should monitor your sugar thermometer, and as it reaches this temperature, add the meringue powder to the egg whites and whisk in medium until it becomes frothy.

Once the sugar syrup has reached 118°C (soft ball stage), take the saucepan off the heat, decrease the mixer speed to medium and slowly trickle the sugar syrup in, down the side of the bowl. (Be warned not to get the syrup onto the whisk as you will then have spun sugar.) Increase speed to high and whisk until the bowl is warm to touch, about 8 minutes.
 Look at that colour! Isn’t it gorgeous?
Add the extra egg white to the almond meal mix, then add the meringue and use a large spatula to thoroughly combine it. Continue folding the mixture to soften the meringue. To achieve “macaronnage”, I mixed the batter about 18 times. Don’t over do this.
Scoop the mixture into a piping bag (stand the piping bag in a tall glass if you can’t quite scoop and hold the bag at the same time) with a 12mm plain tip. Holding the bag slightly above the tray, pipe from the centre of each template circle to make a 4cm round. Keep it just within the border of each template circle. Do so without moving your tip to ensure your round is actually round in shape. At the end of piping each round, flick your tip from 12 o’clock to 6 o’clock quickly to end the piping action. The tip on top should drop back and result in a smooth top. Decorate as you wish the top of the macarons.
Leave the macarons at room temperature for at least 30 minutes until a skin forms. It might take longer in humid days. Preheat your oven to 135°C around 20 minutes into this step (you know your oven best – I use fan force and have it on at 125°C). Test the skin by gently touching the side of a macaron with your fingertip – it should not be sticky. This is important as the skin lifts while the macaron cooks, resulting in the all important ‘foot’! Today I waited for 40 minutes for a nice skin to be formed.

I fan-baked them at 125°C, for 18 minutes. As I have 3 sheets in total, I decided to bake the first in by itself, and then this time add the two last trays in after 6 minutes to see if that changes the results. The macarons in the trays that were baked last were a little bit stickier than the sheet that went in first but still ok with an extra minute in the oven. I think I will stick with baking them individually next time and only resort to time-cutting measures if I run out of time again.
Once out of the oven, the macarons were left for 2 minutes on its trays before I checked them. They peeled off the baking paper quite easily. I then slid the whole sheet off the baking sheet onto my cool marble counter top. This causes a thermal shock and will make it even easier to peel off.

I paired this with a chocolate ganache, and the recipe follows:
150g chocolate, chopped
150ml cream
3 tbsp blueberry jam
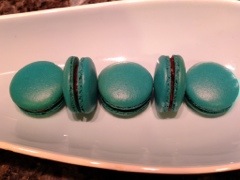
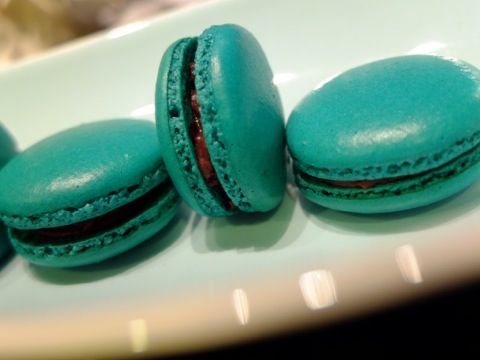
Melt cream in a pot and pour over the chopped chocolate. Let it sit for 2 minutes until the chocolate melts. Add blueberry jam to the chocolate. Mix till the ganache is smooth. Cool in the fridge for 30 minutes until firm for spreading. Use an offset spatula to spread some ganache in the centre of the shells, being careful not to put too much. Once you have half of the shells done, take each top shell and put it on top of one with the ganache, with a twisting motion.

These need to be kept in the fridge for 24 hours for the ganache to flavour the shells, so don’t eat it yet! These can keep in the freezer for up to 3 months – just wrap a few of them (4 or 6) with cling film wraps and place them in a airtight box. Bring them out an hour before serving to allow them to return to room temperature. The moisture will cling to the cling film and not your macarons.
Results: I will definitely add the blueberry jam as a separate layer from the ganache next time, as my dear guinea pigs (aka my lovely colleagues) said they couldn’t taste the flavour.


I love this color! Great job.
Thanks for your comment and your visit to my blog!