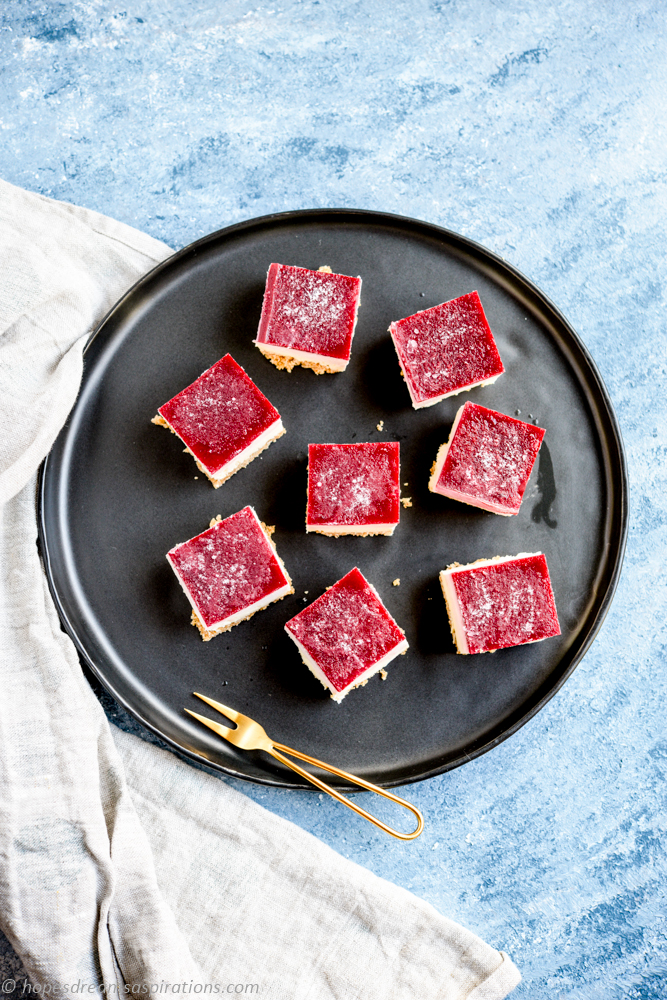
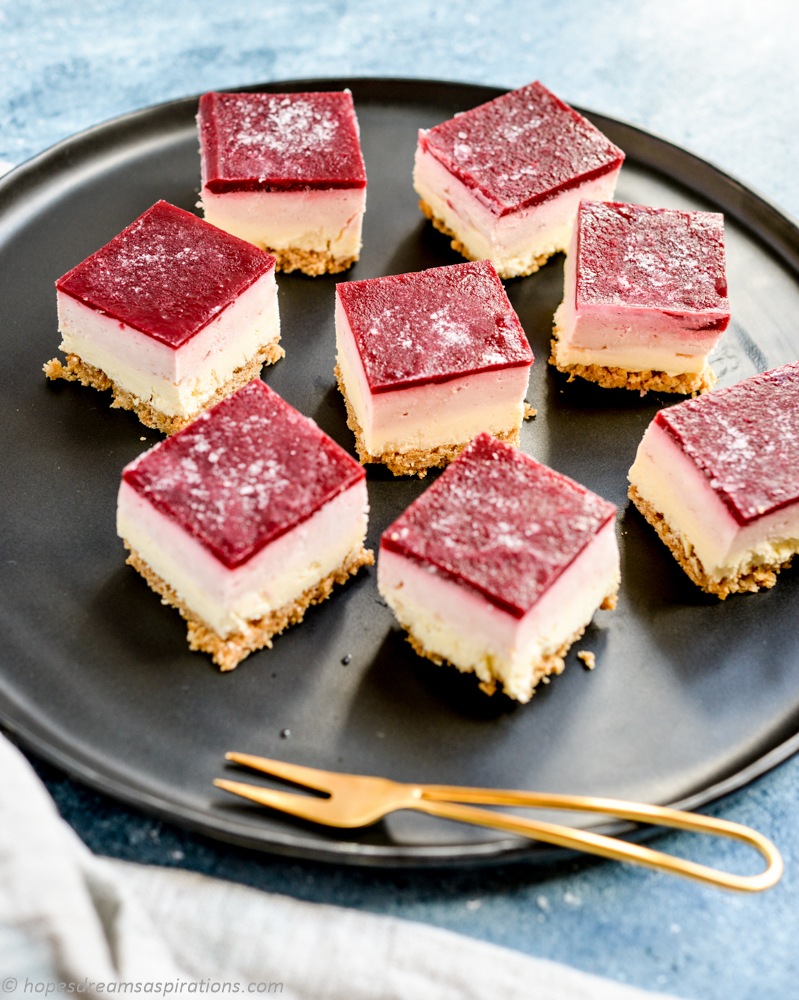

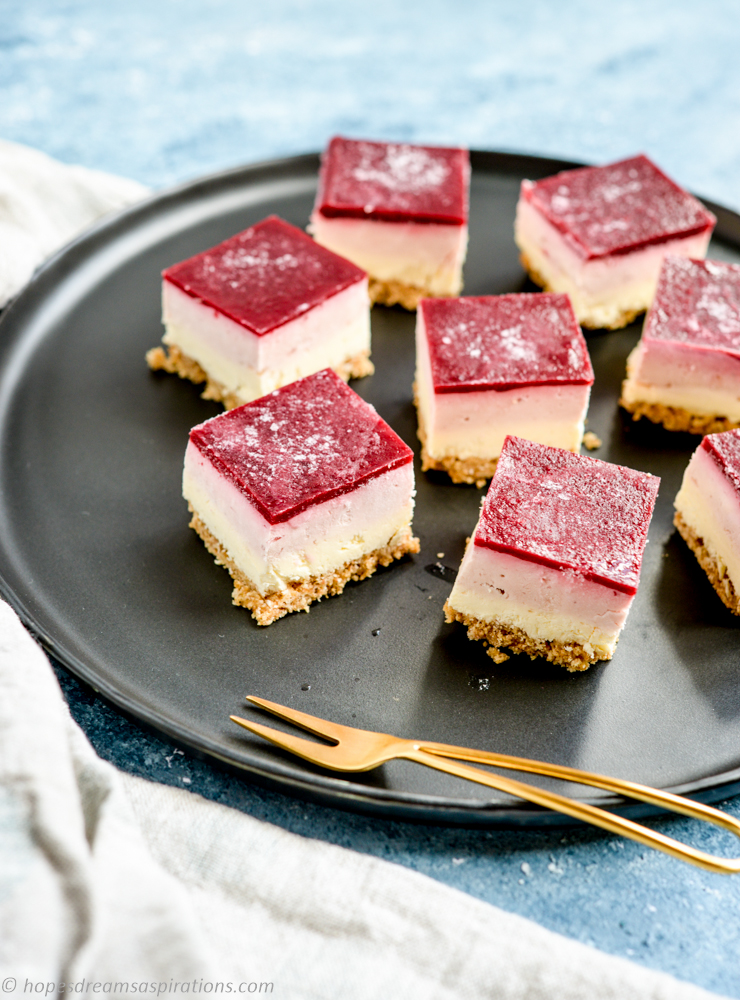

Who remembers the raspberry cheesecake from the freezer section? I used to have that as a treat when I was little. I have always wanted to make my own version of it, refining the flavours and texture.
Here I decided to make an ombre raspberry colour – the graduating pink colour turned out quite well I think.
The raspberry jelly layer was another pleasant surprise – it hardens after freezing and creates this absolutely amazing texture, contrasting the soft and creaminess of the cream cheese layers.
This is a no bake recipe – one based on my previous cheesecake recipes.
Ingredients
Basic Cheesecake:
- 250g Nice biscuits
- 100g unsalted butter, melted
- 500g cream cheese
- 250g mascarpone cheese
- 600ml cream, whipped
- 125ml Raspberry puree (I use Pontier, alternatively you can blend up frozen fruit)
- 4 tsp gelatin powder dissolved in 75ml hot water
Fruit jelly:
- 125ml Raspberry puree
- 1.5 sheets of gold strength gelatin, bloomed in ice cold water
Instructions
- Smash biscuits into fine crumbs. Mix with melted butter and press onto the base of a square tin, lined with baking paper. Chill in the fridge while you prepare the cheesecake filling.
- Beat the cream cheese and mascarpone until smooth.
- In a small bowl, add the gelatin powder to the hot water, mixing vigorously. Add to the cream cheese mixture.
- Whip cream till soft peaks form and add to the mixture.
- To create the ombre effect, take out half of the cream cheese-gelatin-whipped cream mixture and save as the white colour layer.
- To the remaining mixture, add in the raspberry puree. Mix till the puree is evenly distributed in the cream cheese. This will be your pink layer.
- Pour the white cream cheese mixture on top of the biscuit base. Smooth with an angled spatula.
- Carefully pour the pink cream cheese mixture on top to ensure the two layers remain separate. Place in the fridge to set.
- For the top raspberry jelly layer: Soak gelatin sheets in ice cold water for at least 5 mins. Heat the raspberry puree till it begins to boil. Take it off the heat. Squeeze water from gelatin sheets and add to the puree. Stir to melt gelatin thoroughly and pour on top of the set cheesecake.
- Let it set in the fridge for a further 4 hours (or overnight) and transfer to the freezer.
- One hour before serving, remove from the freezer. Let the cheesecake defrost for 30 minutes and cut into squares with a warm knife. Leave to defrost a further 30 minutes before serving.
Ps. It’s totally fine to serve after setting the cheesecake in the fridge without freezing it! That gives you a normal textured cheesecake.
